El dia de hoy vamos a crear una simple base de datos en Azure SQL Database, para lo cual vamos a necesitar realizar las siguientes acciones:
Your Challenge:
– Crear un Resource Group de nombre «sqldbgroup»
– en este resource group crearemos una SQL Database de nombre «mydb»
– Crear una nueva database server, and give it a unique name
– Fill the database with the sample AdventureWorks Database
– Download and install SQL Server Management Studio 2017
– Connect to the mydb database and run a simple query
Solution:
Step 1 Sign Into Azure
Sign in to Azure at https://portal.azure.com/
Step 2 Crear un resource group
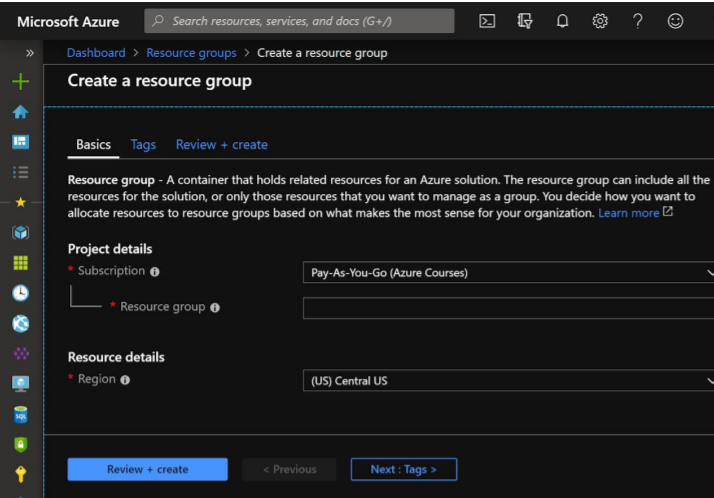
1. In the navigation list, click Resource groups.
2. Click Add to open the Resource group blade.
3. For Resource group name, enter sqldbgroup.
4. Select a subscription and a location.
5. Click Review + Create to proceed to the last step.
6. Click Create to create the resource group.
7. Click Refresh to refresh the list of resource groups.
Por lo cual ahora el nuevo «Resource Groups» deberia de aparecer junto al resto de nuestros Resource Groups, siempre y cuando tengamos ya otros creados.
Step 3 Crear a SQL Database
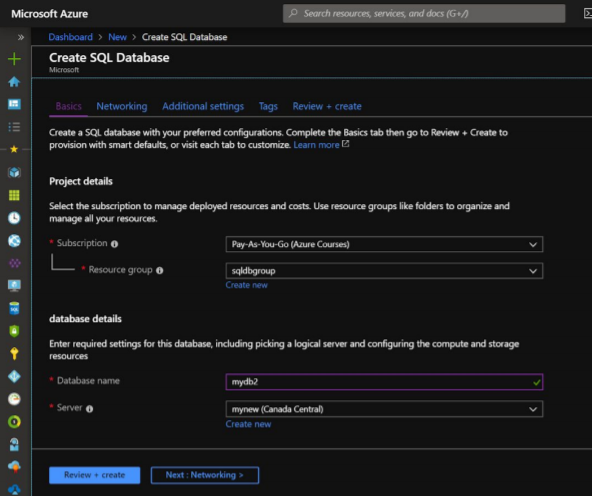
1. Click the Create a Resource (green plus sign) on the menu
2. Navigate to “Databases” in the category list
3. Choose SQL Database
4. Choose your subscription
5. Choose the sqldbgroup for resource group
6. Give the database the name mydb
7. Create a new server
a. Give the server a unique name
b. Choose an admin user name and password that you would remember
c. Choose your location
8. Choose No to using elastic pool
9. Leave the default server size
10. Choose Next : Networking
11. Choose Next : Additional Settings
12. Select “Sample” under Use Existing Data.
13. Choose Review and Create.
14. Choose Create.
15. Wait for the database to create. It could take around 5 minutes.
Step 4 Open the Firewall to Your Computer
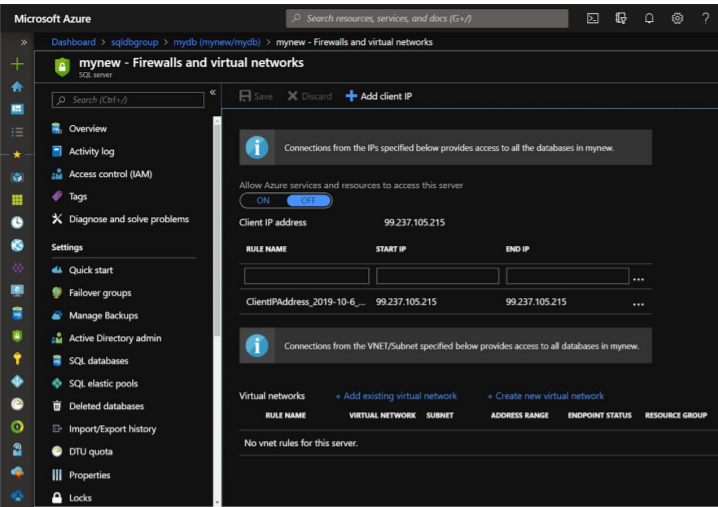
1. In the Azure portal, navigate to your new mydb database.
2. Click on the “server name” from the mydb overview screen.
3. Click “Show Firewall Settings” from the Azure SQL Database server overview
screen.
4. Click “Add Client IP” in the top menu.
5. Click Save.
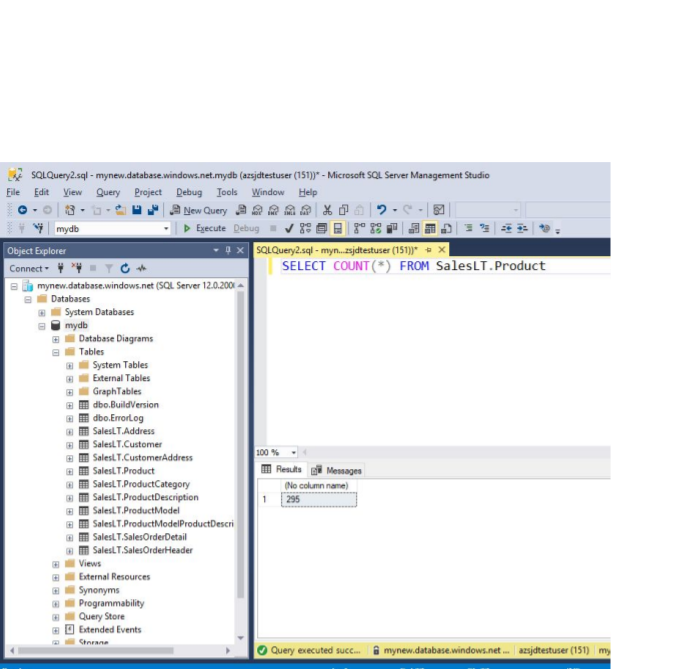
Step 5 Query the SQL DB
1. Download and install SQL Server Management Studio if you don’t currently have it
a. https://docs.microsoft.com/en-us/sql/ssms/download-sql-server-managementstudio-ssms?view=sql-server-2017
2. In the Azure portal, navigate to your new mydb database.
3. Copy the “server name” from the mydb overview screen.
4. Run SQL Server Management Studio on your desktop
5. Use the “server name” provided by Azure Portal in step 3
6. Use “SQL Server Authentication” method
7. Provide the login and password you set when creating the server
8. Click Connect.
9. Click on the mydb database on the left.
10. Click “New Query” from the top bar of SQL Server Management Studio
11. Enter the following query and execute:
a. SELECT COUNT(*) FROM SalesLT.Product
12. Examine the results
y en un inicio eso seria todos, hasta aqui esta entrada, de ahoro en adelante pueden continuar usando o desarrollando la database a su gusto y con la informacion que consideren mas conveniente.
NOTA: esta entrada la he tenido que rehacer porque por algun motivo extraño se daño todo el contenido y no pude recuperar el origen.
Hasta luego